Get air moving below decks & minimize mold and mildew by installing a solar vent.
Difficulty Level: Easy
Materials:
- Vent
- Butyl tape or silicone sealant
- Tools:
- Hole saw
- Drill
- Screwdriver
- Sandpaper
Cost: $200
A solar vent is a great addition to any boat with a below-deck area. Requiring no external power or wiring, the vent will ensure air circulation and help prevent mold and mildew, especially when the boat is left closed up for extended periods.
Some vents can be set to run in either direction, so you can further enhance efficiency by installing two–one to draw air in, another to extract.
Typically, vents can be installed in hatches that have Lexan (polycarbonate) panels.
This is an easy project that almost anyone with a basic set of tools can achieve, although you may need to purchase a hole saw of the correct size.
Note that I used butyl tape as a sealant, but an alternative is silicone sealant, both available from retailers like West Marine.
Carefully read any instructions that come with your particular model vent before starting the installation as they may differ slightly from those shown in the photos.
Some vents, like the one I fitted, have a battery that’s charged during the day so the fan will continue to work after the sun goes down.
Step 1
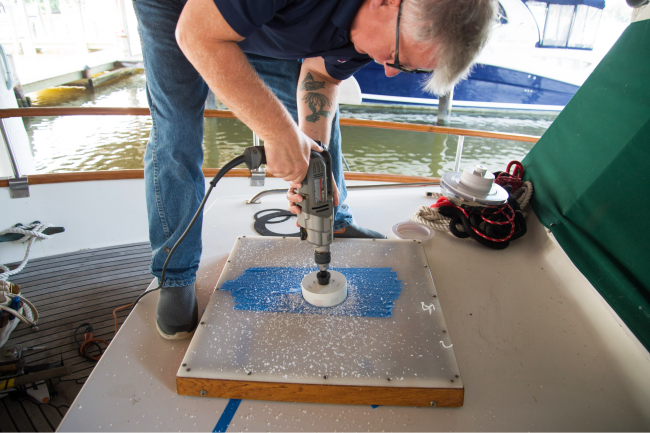
Cover the center section of the hatch with masking tape. Mark the center point by drawing across the diagonals, noting where the lines cross. Carefully drill through the Lexan with the hole saw. You’ll likely need a corded drill as rechargeable cordless drills often lack sufficient power. You may also need to use a center punch to guide the drill at first.
TIP: To avoid clogging the hole saw teeth or melting the Lexan hatch, occasionally run the drill in reverse for few seconds.
Step 2
Smooth the edge of the hole with sandpaper, then drill any additional mounting holes for screws or bolts.
Temporarily screw the top flange in position, then test fit the vent.
Step 3
Apply a bead of sealant to the underside of the mounting flange –I used butyl tape, but you can use silicone–before permanently fixing the top flange in place. Clean off excess sealant.
Step 4

Mount the vent into position by screwing it into the mounting flange. This aligns the vent in the hole. Then install the inner trim ring complete with a neoprene gasket.

Finally, sit back and enjoy the fresh air!


- 4,000 Marinas
- Thousands of anchorages
- Updated Charts
- Mile-by-Mile Navigation
- Highlighted Alerts & Cautions
- Full-Color Aerial Photographs

The Waterway Guide App Makes it easy to leave reviews, use our explorer, and view waterway guide materials all on the go!